SMALL STEPS. USEFUL SKILLS.
Set up fingerprint or face sign-in
Sign in to Windows quickly and securely without typing your password every time.
Use the pictures where shown. Follow the short instructions between them.
STEP 1 OF 9
Open Start
Select the Start button (the Windows logo) on the taskbar.

Prefer to see all the steps together?+
STEP 1
Open Start
Select the Start button (the Windows logo) on the taskbar.
STEP 2
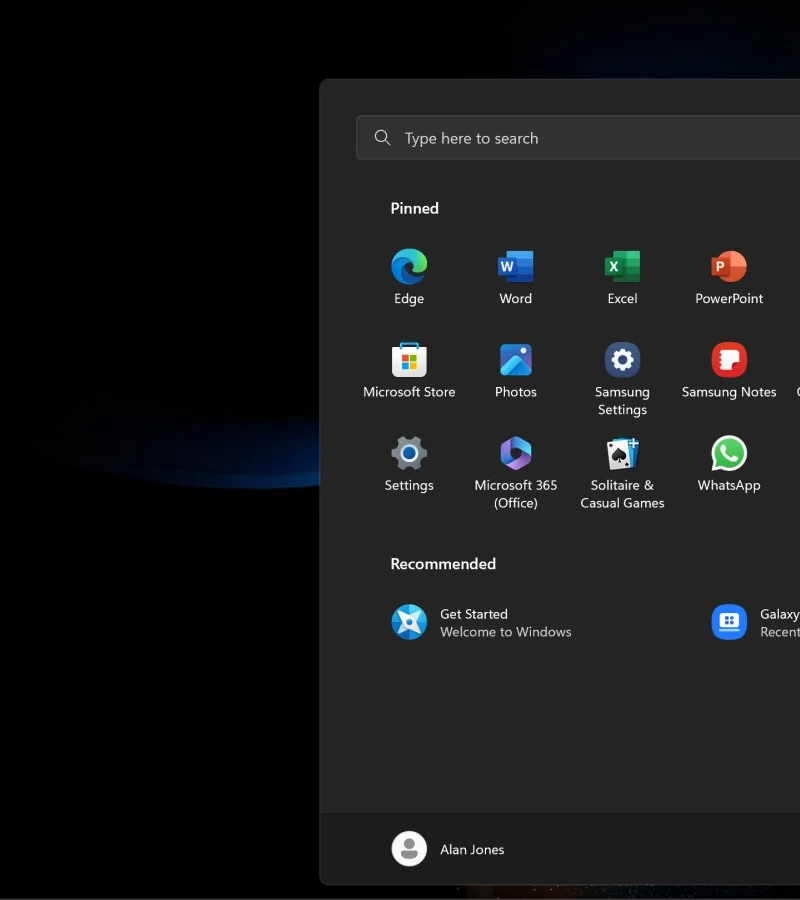
Open Settings
Select Settings (the cog).
STEP 3
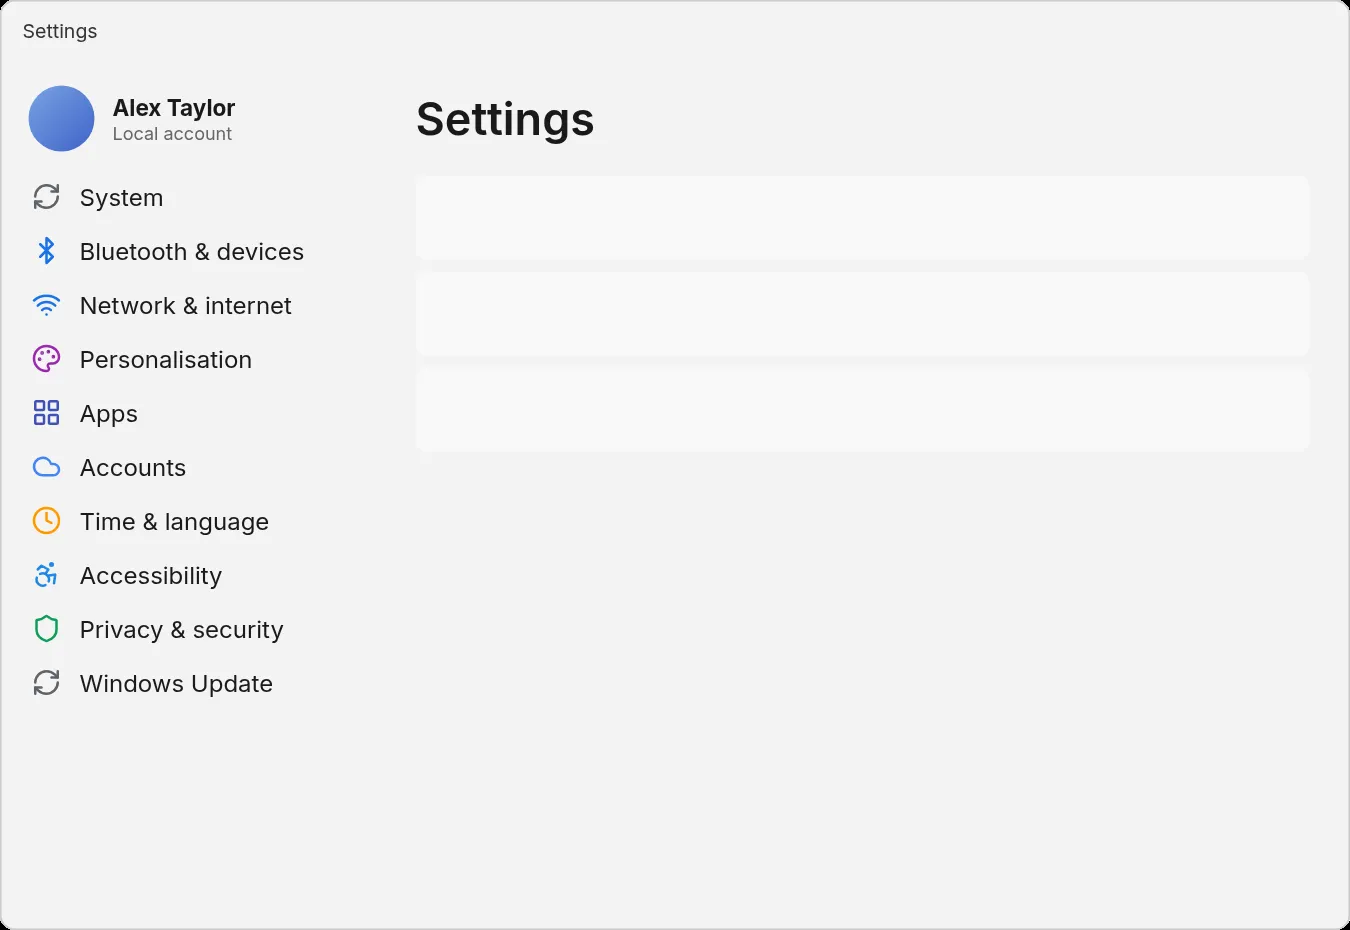
Open Accounts
Select Accounts on the left.
STEP 4
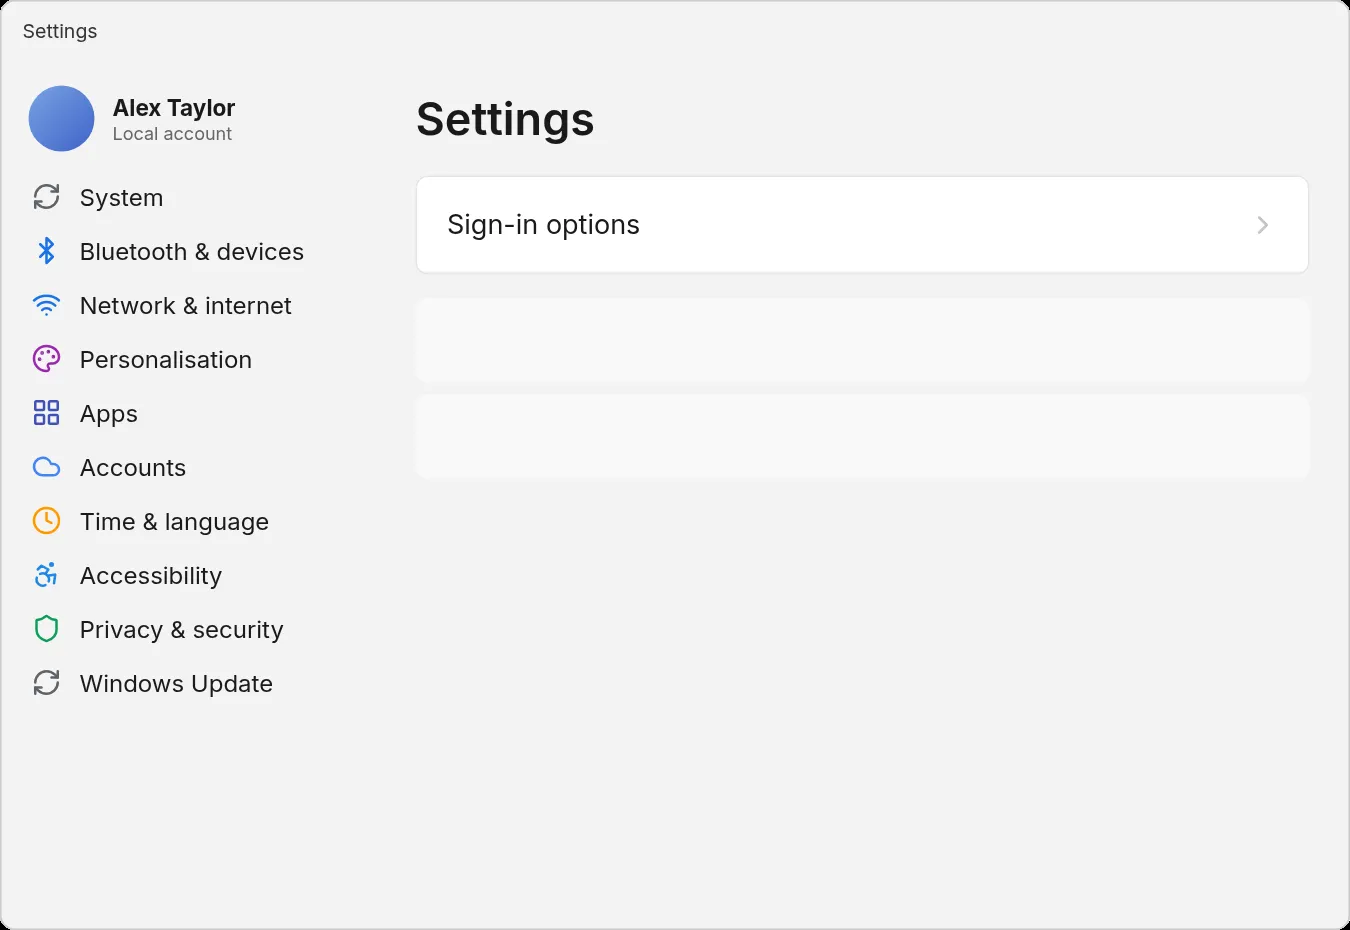
Open Sign-in options
Select Sign-in options.
STEP 5
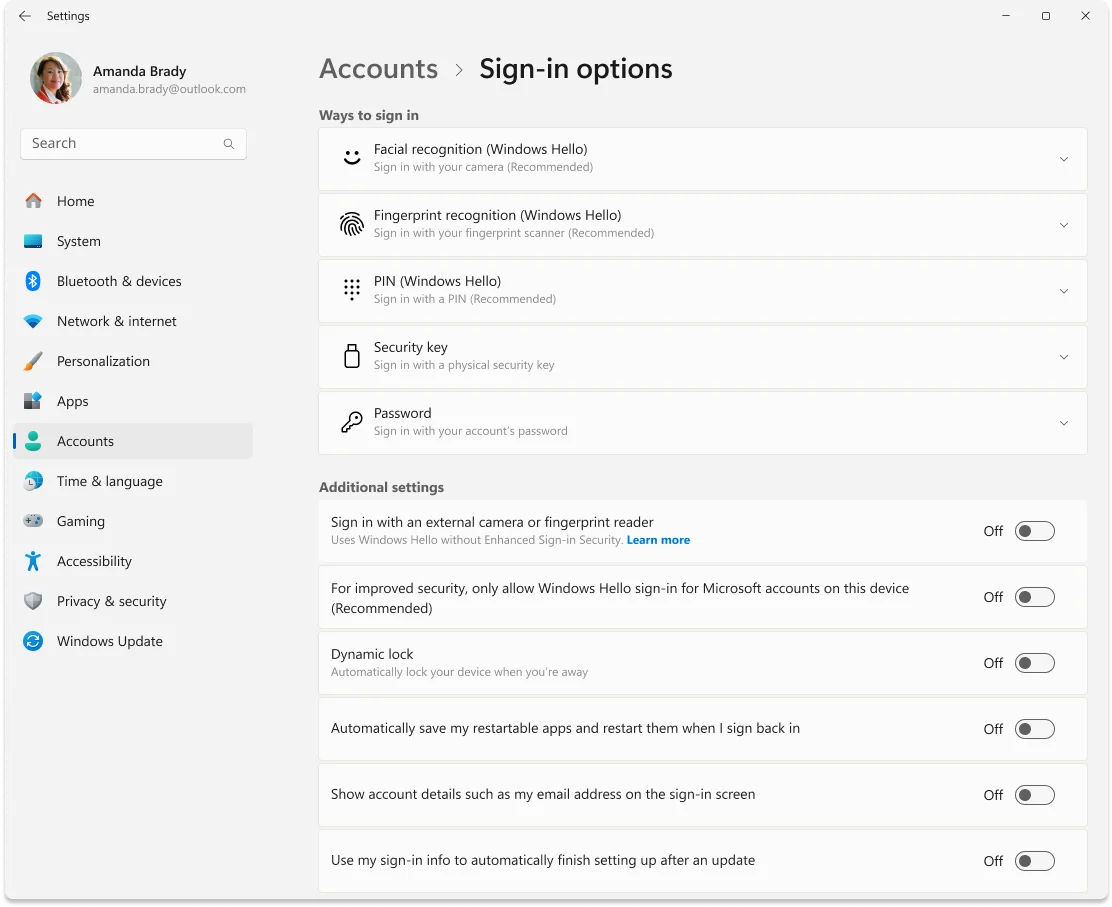
Choose face or fingerprint
Under Ways to sign in, select Facial recognition (Windows Hello) or Fingerprint recognition (Windows Hello).
An ordinary webcam is not enough for face sign-in: it needs a Windows Hello-compatible infrared camera.
The highlighted rows offer face and fingerprint sign-in. Only choose an option supported by your hardware. An example account is shown.
STEP 6
Select Set up
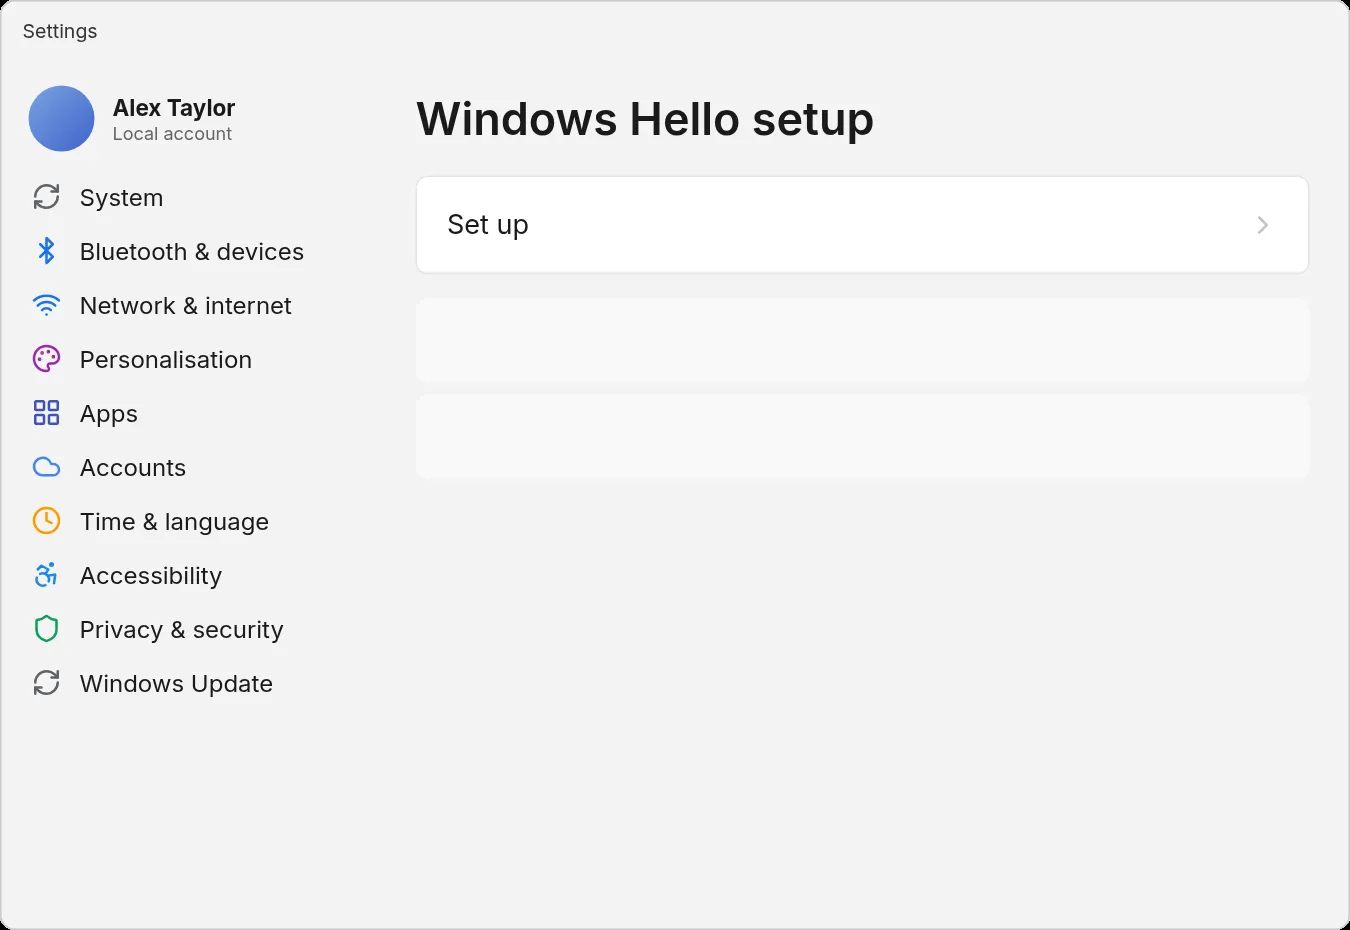
STEP 7
Follow the prompts
Follow the on-screen prompts to scan your face or fingerprint.
STEP 8
Enter your PIN
If asked, enter or create your PIN.
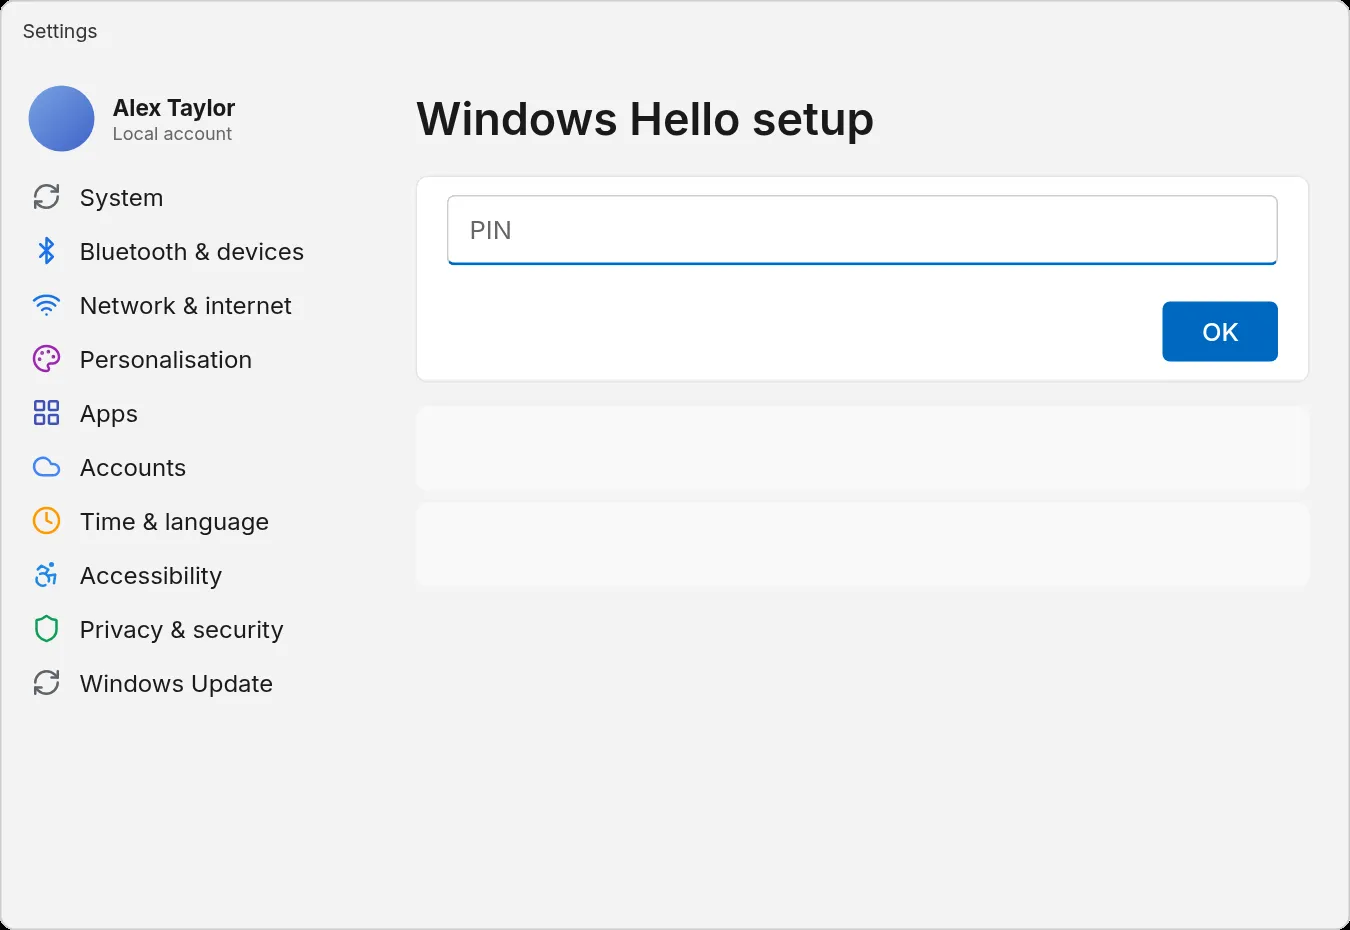
STEP 9
Try it next time you sign in
At your next sign-in, use the face or fingerprint option you set up. Keep your PIN available as a fallback.

IF SOMETHING LOOKS DIFFERENT
A little help along the way.
Your menus may look different after an update. Look for the same control name and take your time.
I cannot find that option+
Check that this guide covers your device and software. If the names do not match, use the manufacturer’s instructions linked below for your model.
I need to go back a step+
Use Previous step or select a step number above. This changes the guide only; it does not undo anything on your device.
Are these pictures of my device?+
They are example screens showing exactly where to click. Your names, apps, wallpaper and layout may look a little different, but the options you need are the same. Some pictures show what you should see after a step.