SMALL STEPS. USEFUL SKILLS.
Set up fingerprint or face unlock
Unlock the phone quickly and securely without typing a PIN every time.
Use the pictures where shown. Follow the short instructions between them.
STEP 1 OF 13
Open Quick Settings
Swipe down from the top with two fingers.
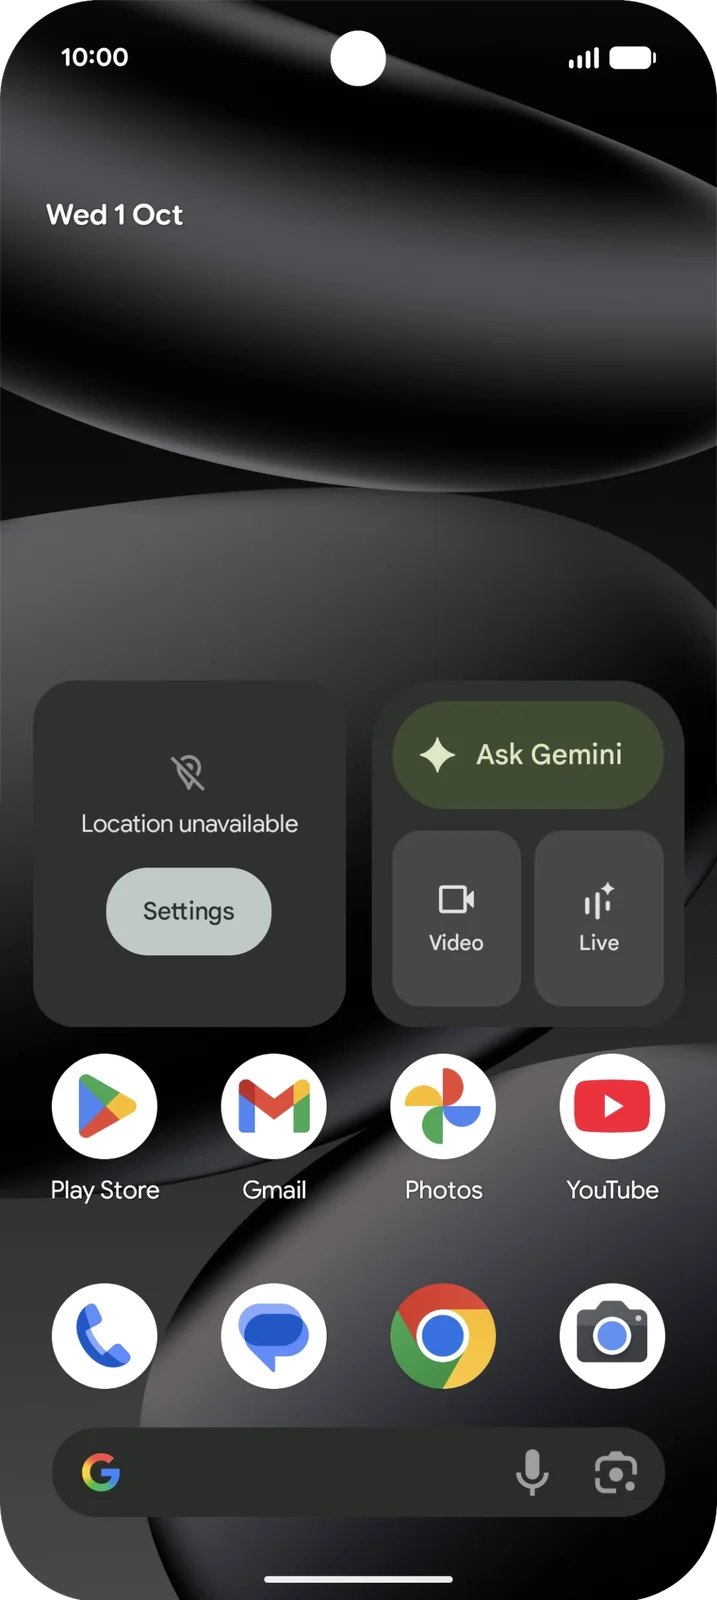
Start at the top edge of the screen.
Prefer to see all the steps together?+
STEP 1
Open Quick Settings
Swipe down from the top with two fingers.
Start at the top edge of the screen.
STEP 2
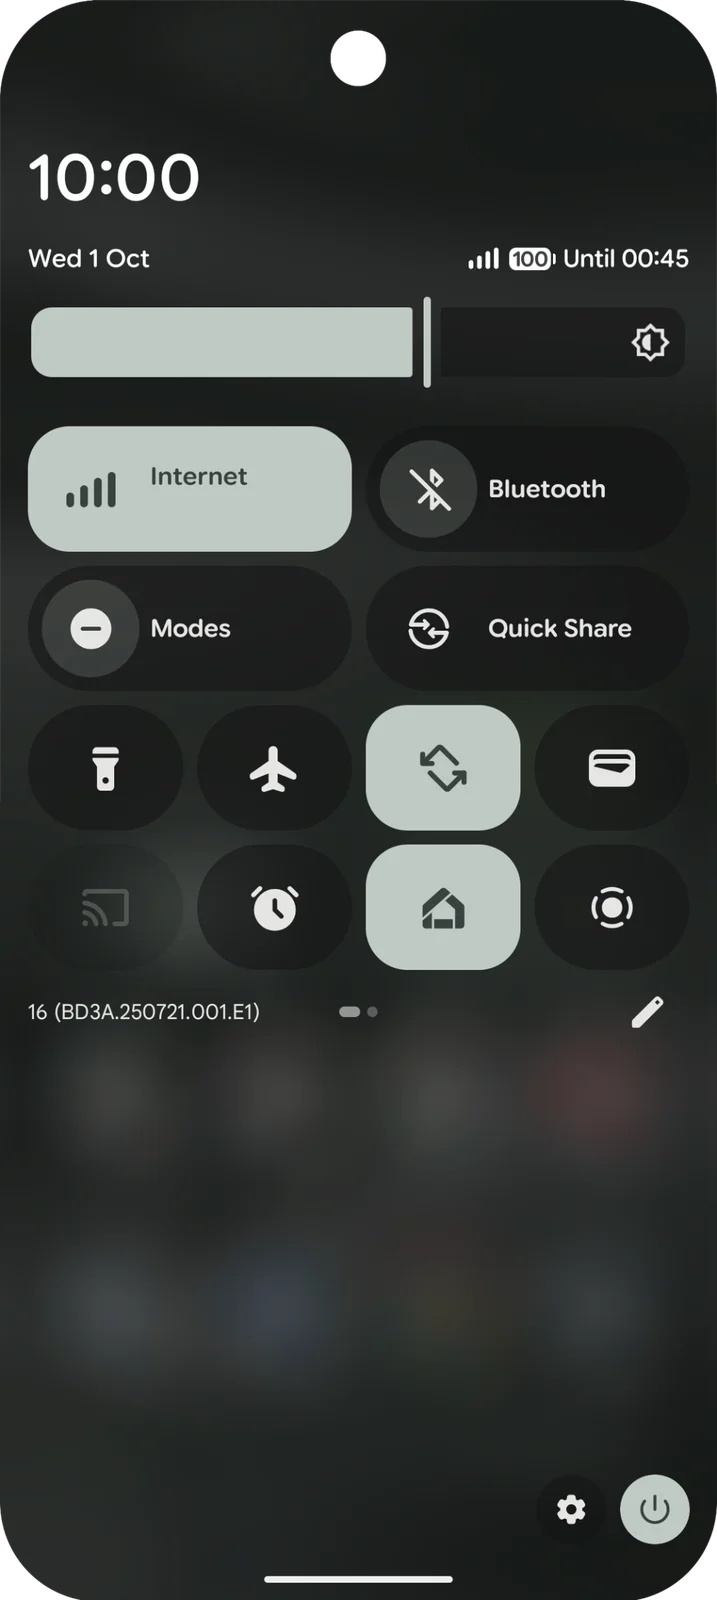
Open Settings
Tap the cog near the bottom right.
The cog is beside the power button.
STEP 3
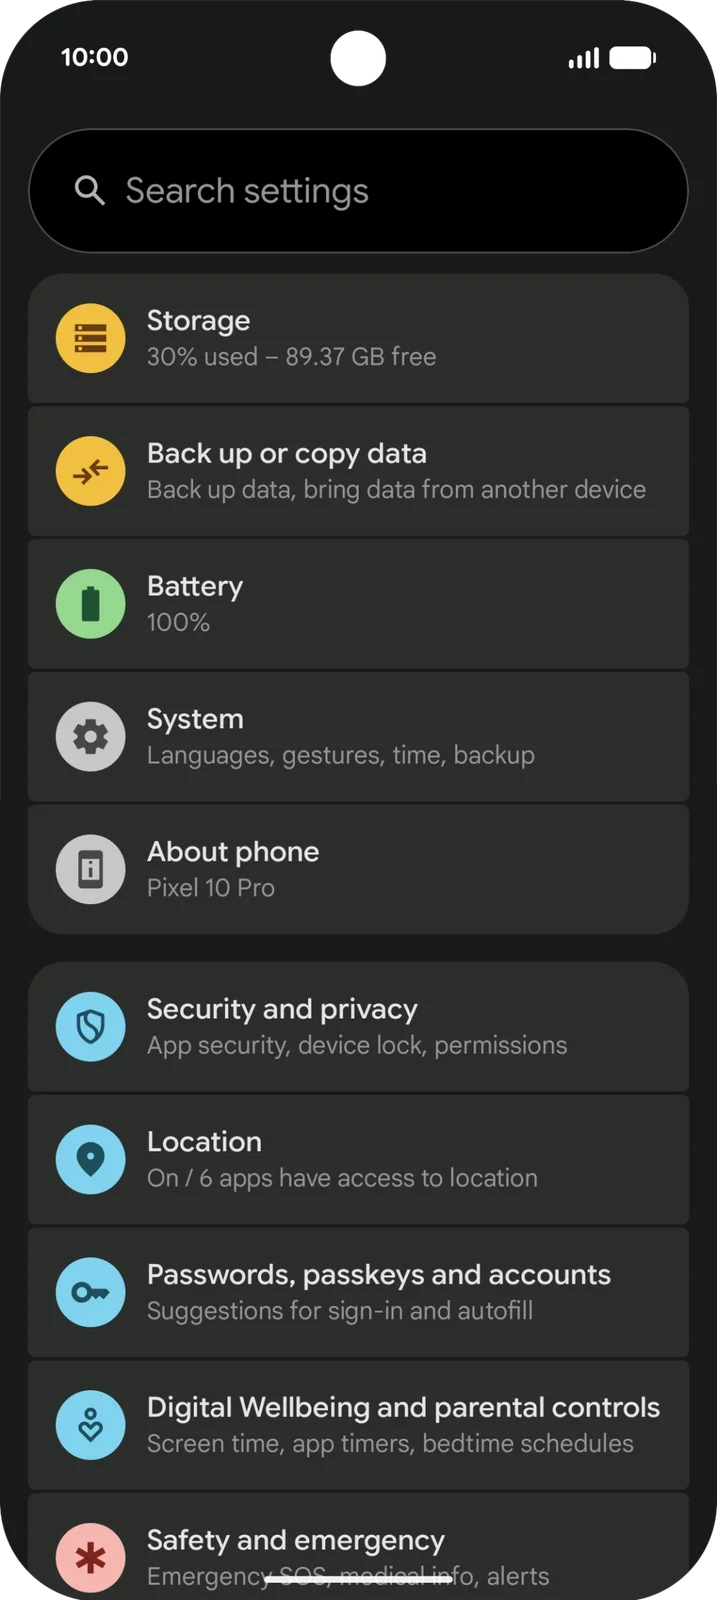
Open Security and privacy
Scroll down in Settings, then tap Security and privacy.
The highlighted row is below About phone.
STEP 4
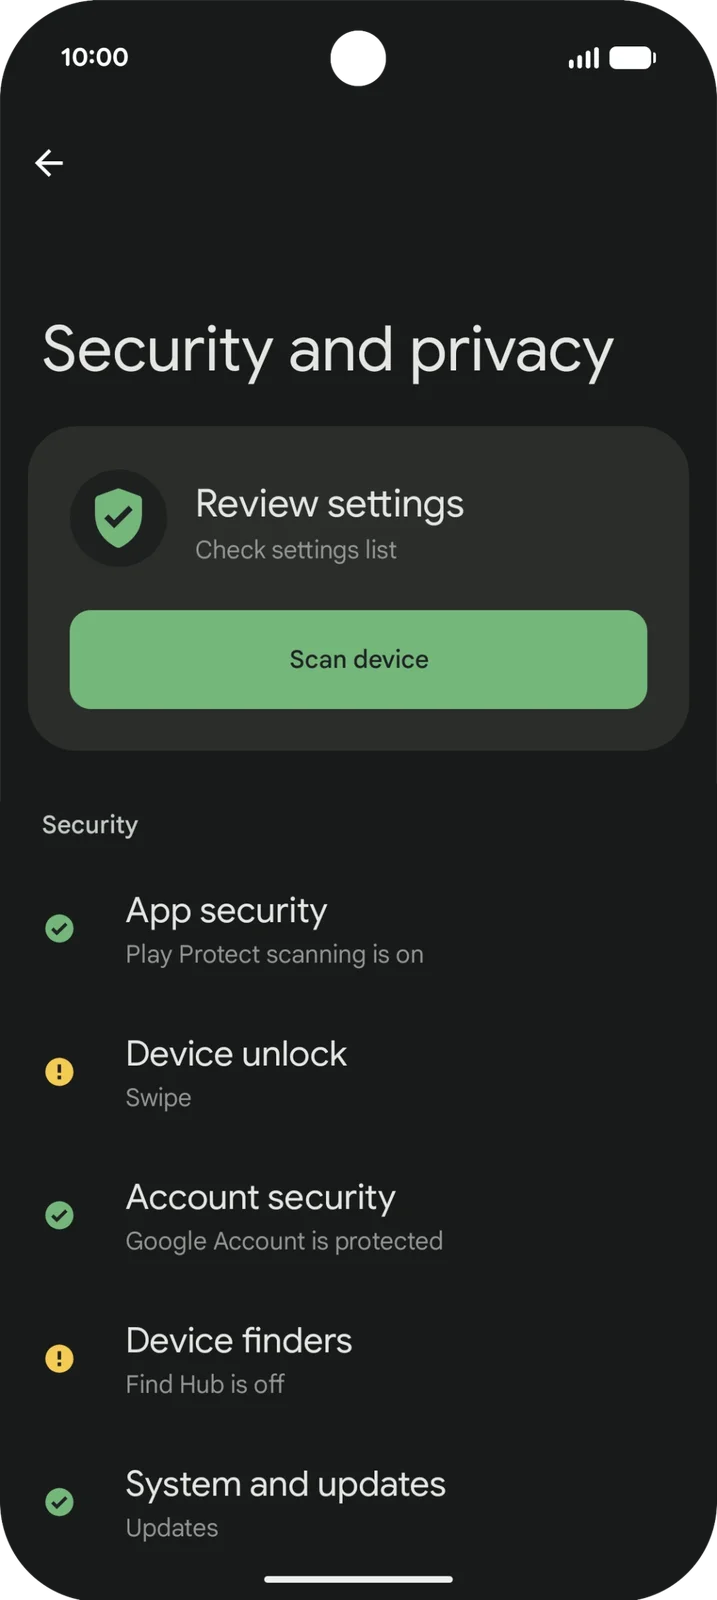
Open Device unlock
Tap Device unlock.
Device unlock contains the screen lock and fingerprint choices.
STEP 5
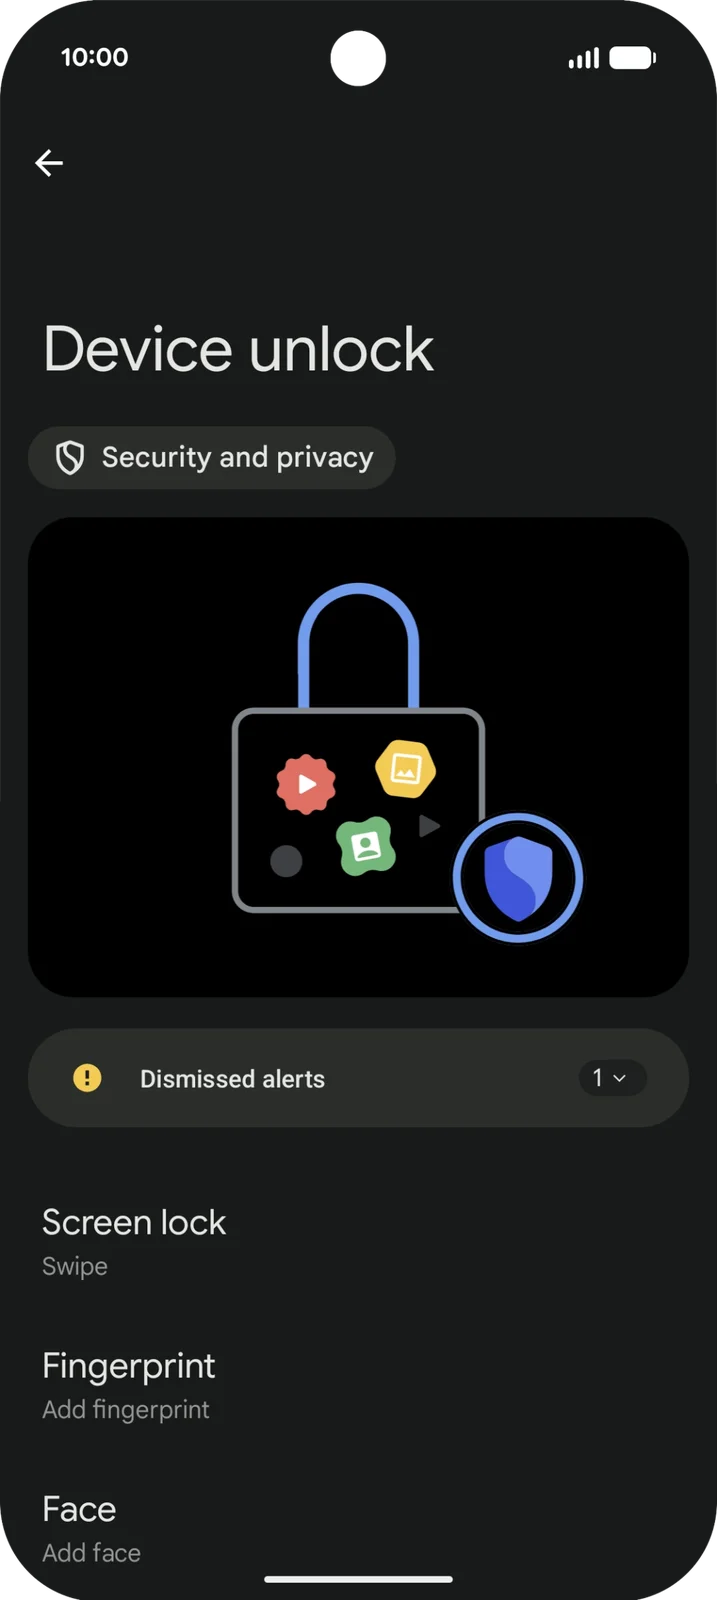
Choose Fingerprint
Tap Fingerprint. If asked, enter your existing screen lock.
Fingerprint is below Screen lock. The example has not added a fingerprint yet.
STEP 6
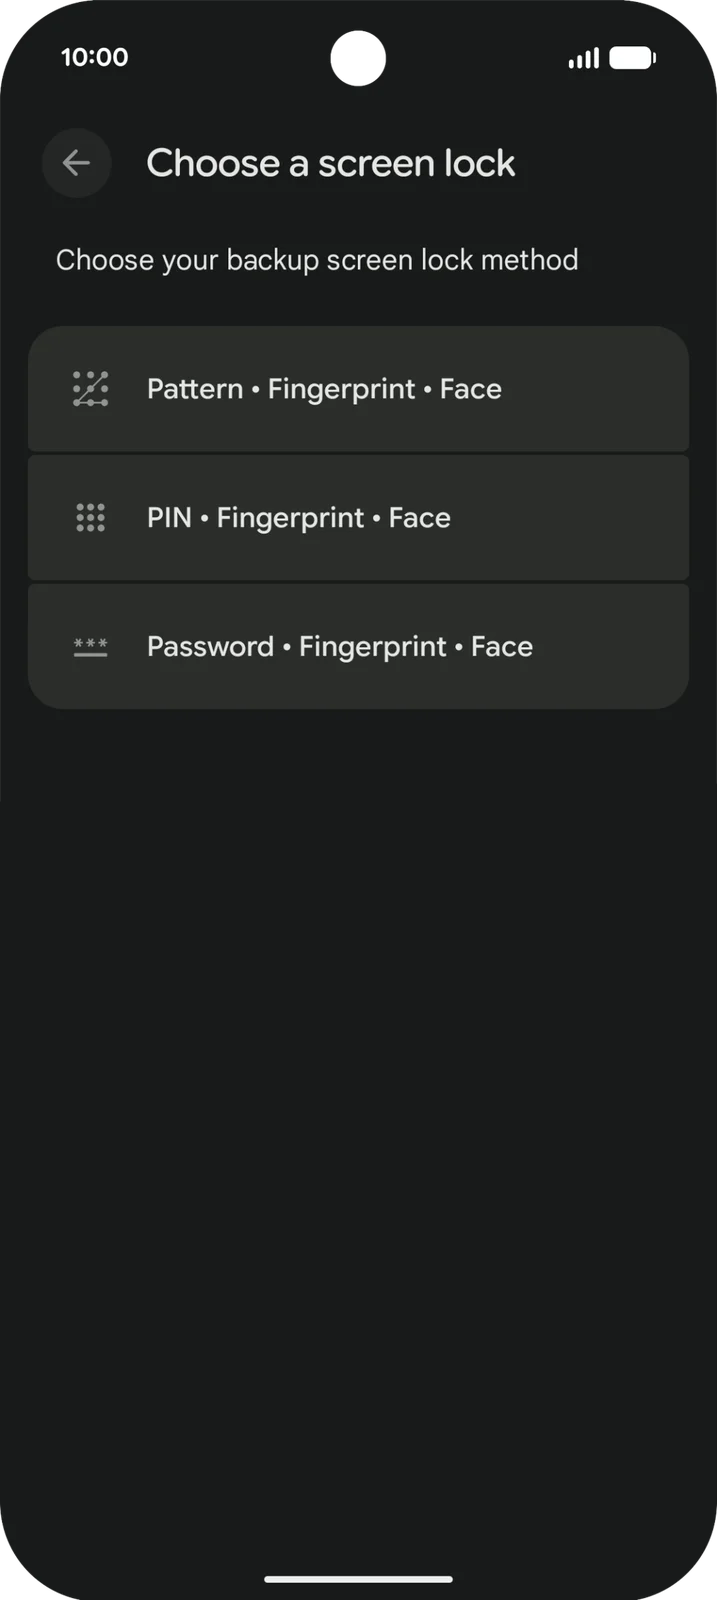
Set a backup if needed
If asked, choose a PIN, pattern or password and follow the prompts to create it.
This chooser appears when there is no backup lock. Entering and confirming the code are not pictured. Keep your existing lock if one is already set.
STEP 7
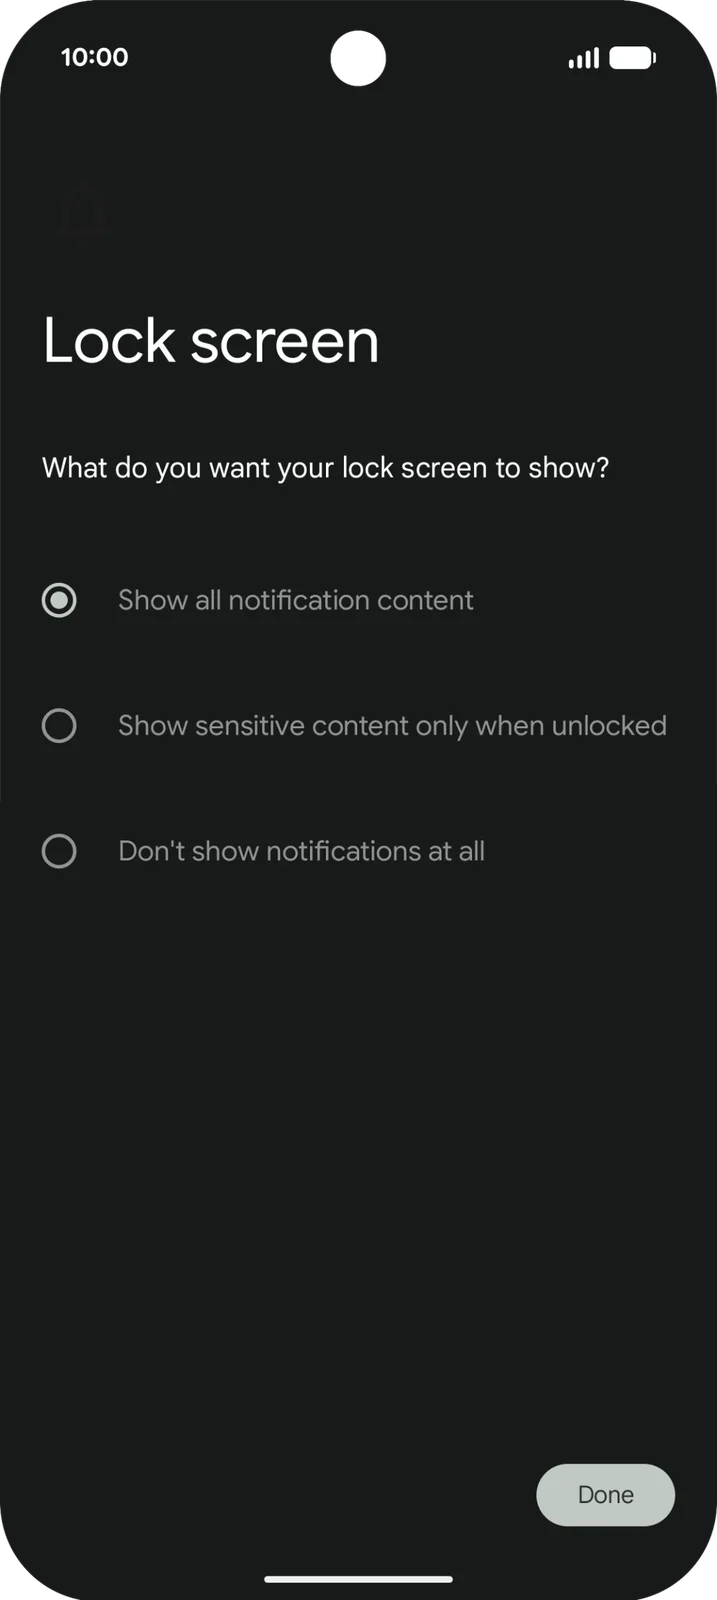
Choose notification privacy
If this page appears, choose how much notification content to show while the phone is locked.
This example shows all content. Choose the privacy level you want; it is not necessary to copy the selected option.
STEP 8
Continue from privacy settings
Tap Done after making your choice.
Done is at the bottom right.
STEP 9
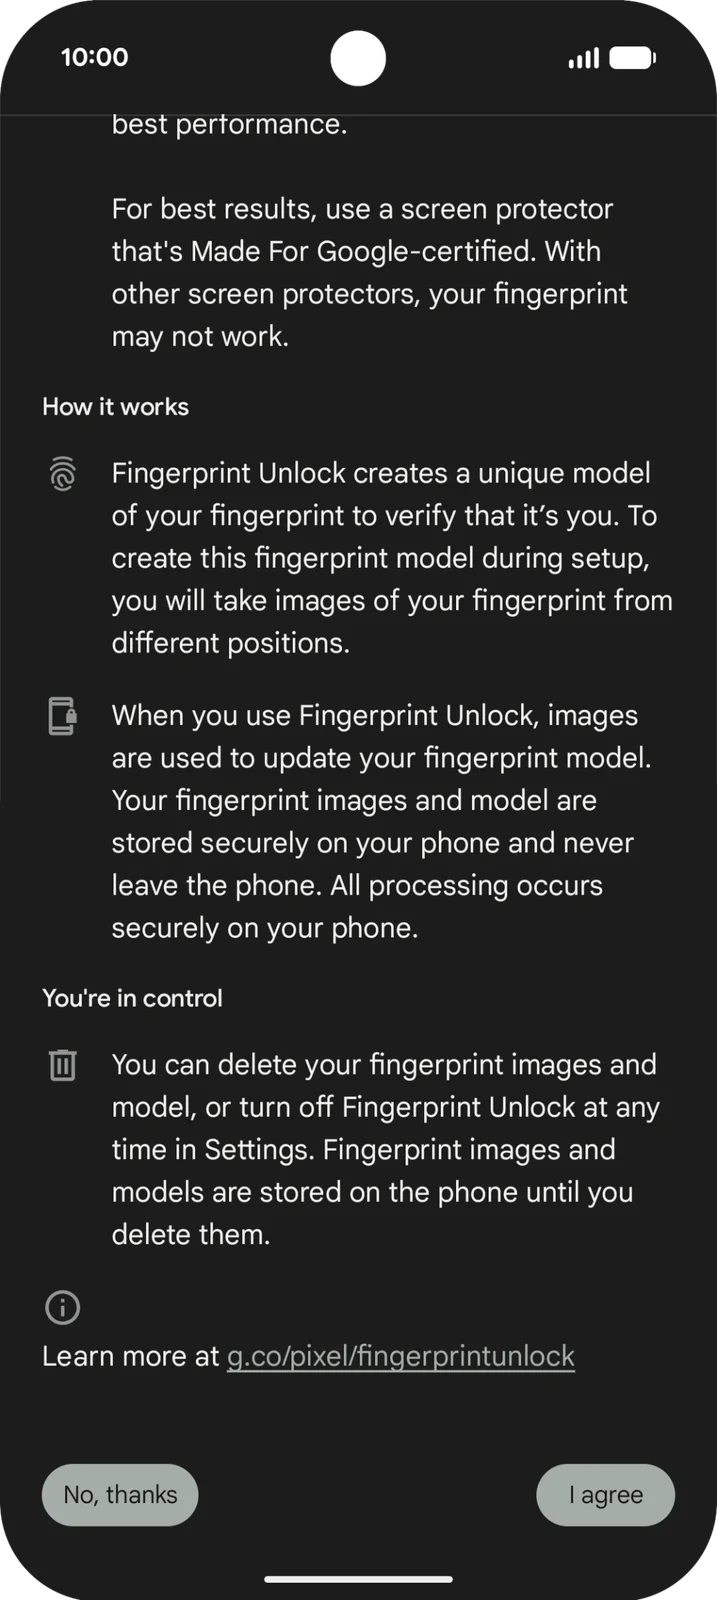
Read the fingerprint information
Read the information, scrolling if needed. Tap I agree only if you want to continue.
This is the bottom of the information page. No, thanks cancels this part of setup.
STEP 10
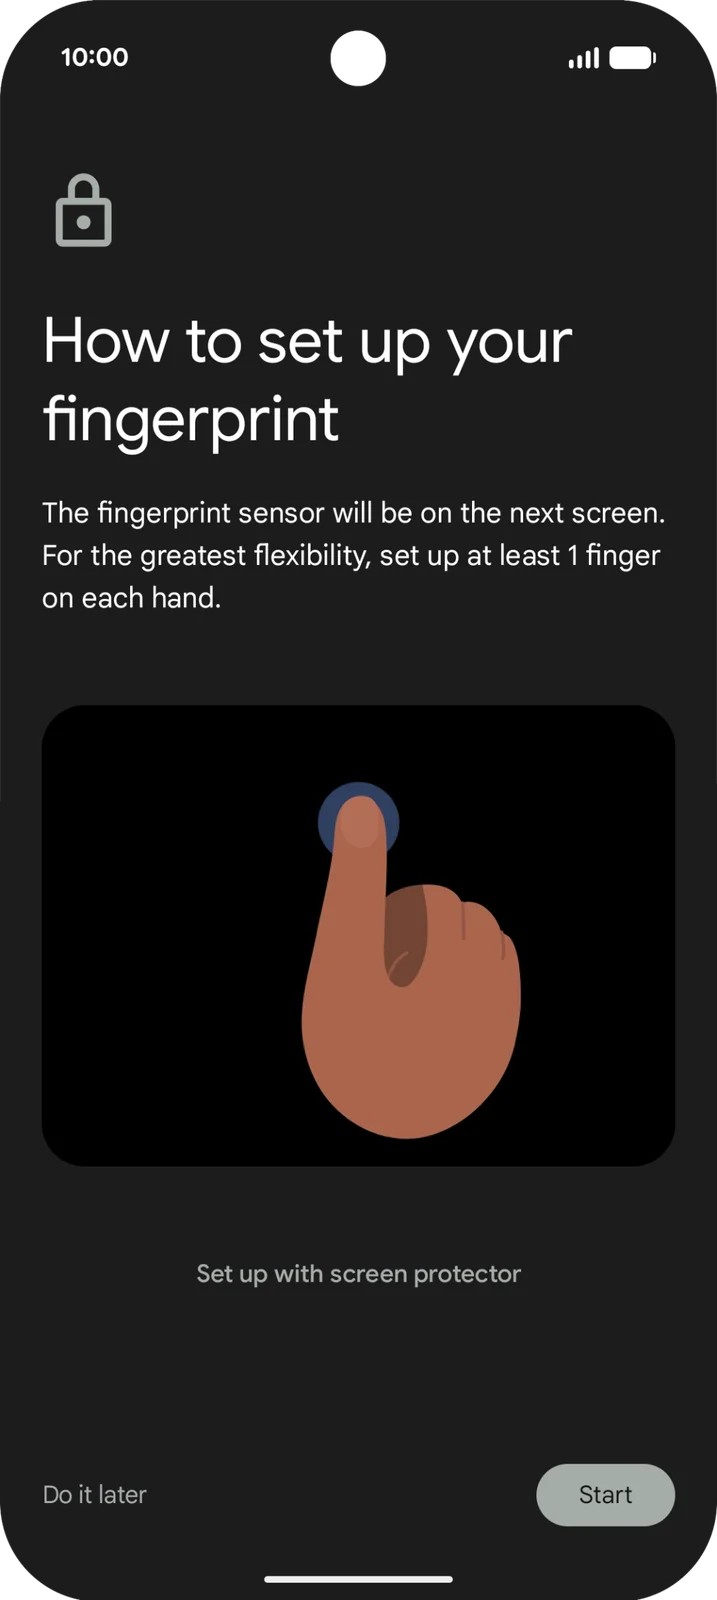
Start the fingerprint scan
Tap Start, then follow your phone’s prompts to place and reposition your finger on its sensor.
This picture shows the page before scanning. The moving scan progress is not pictured.
STEP 11
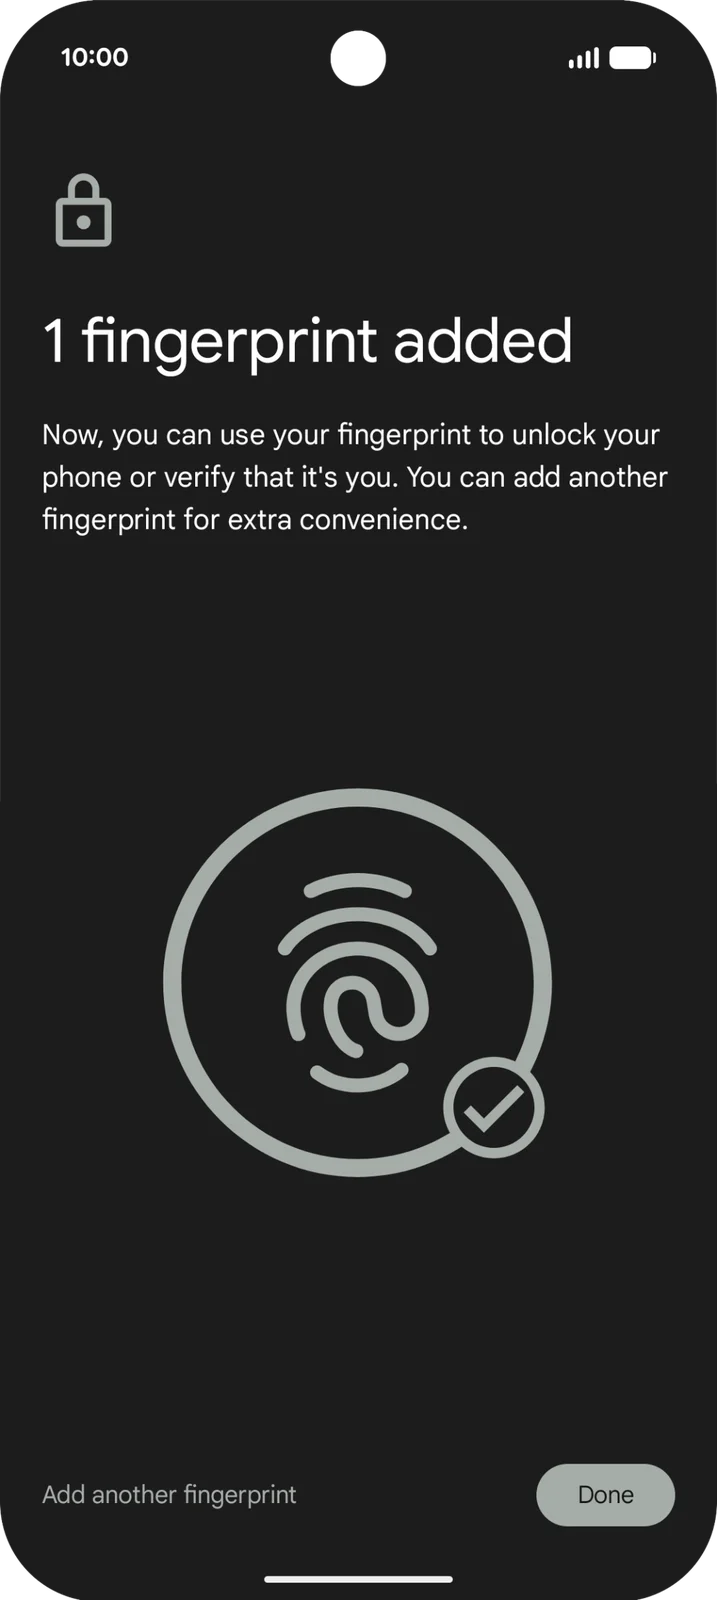
Finish adding the fingerprint
Wait for 1 fingerprint added, then tap Done.
This is the successful setup screen. Adding another fingerprint is optional.
STEP 12
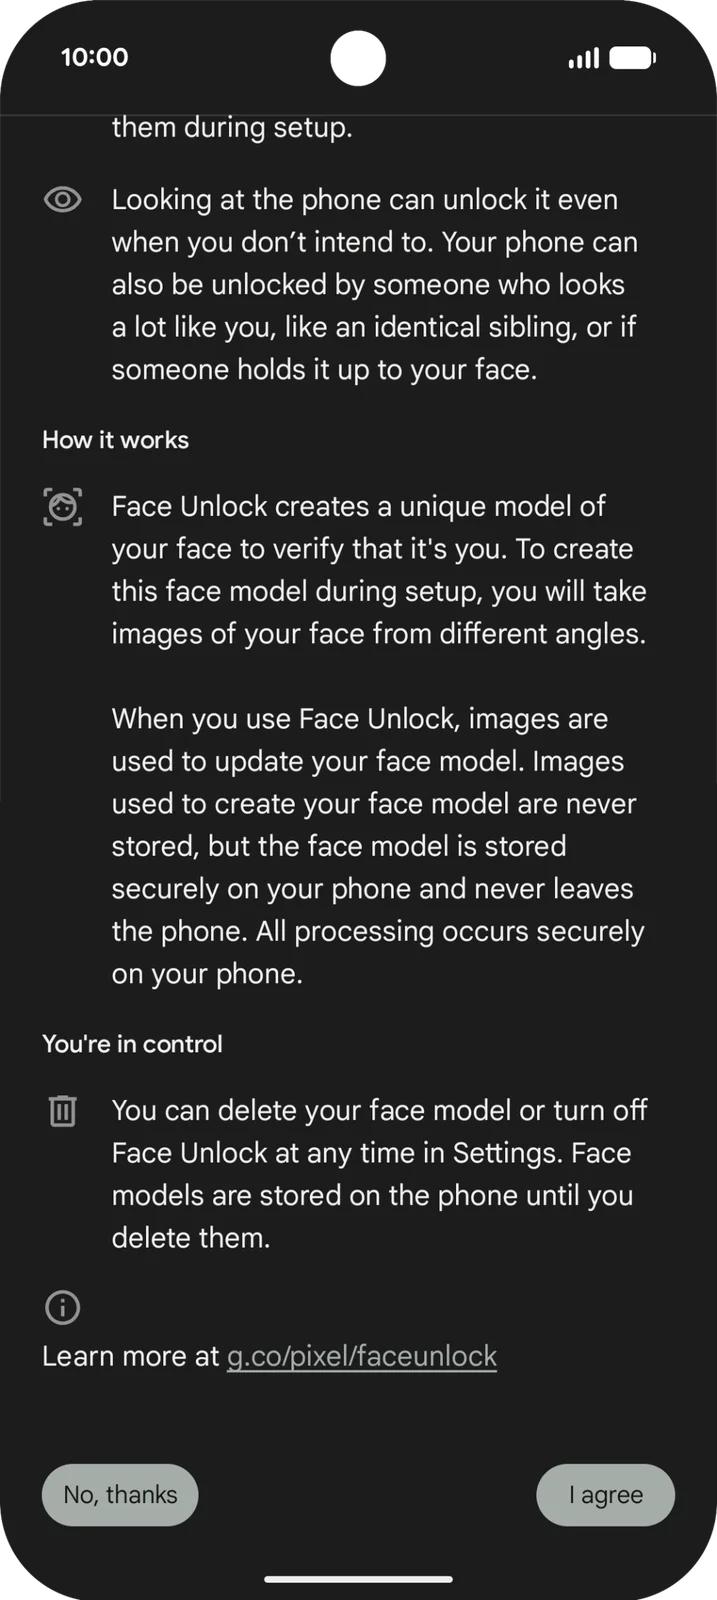
Skip Face Unlock if offered
If you only want fingerprint unlocking, tap No, thanks on the optional Face Unlock page.
This picture shows the bottom of the Face Unlock information. You do not need to set it up to use your fingerprint.
STEP 13
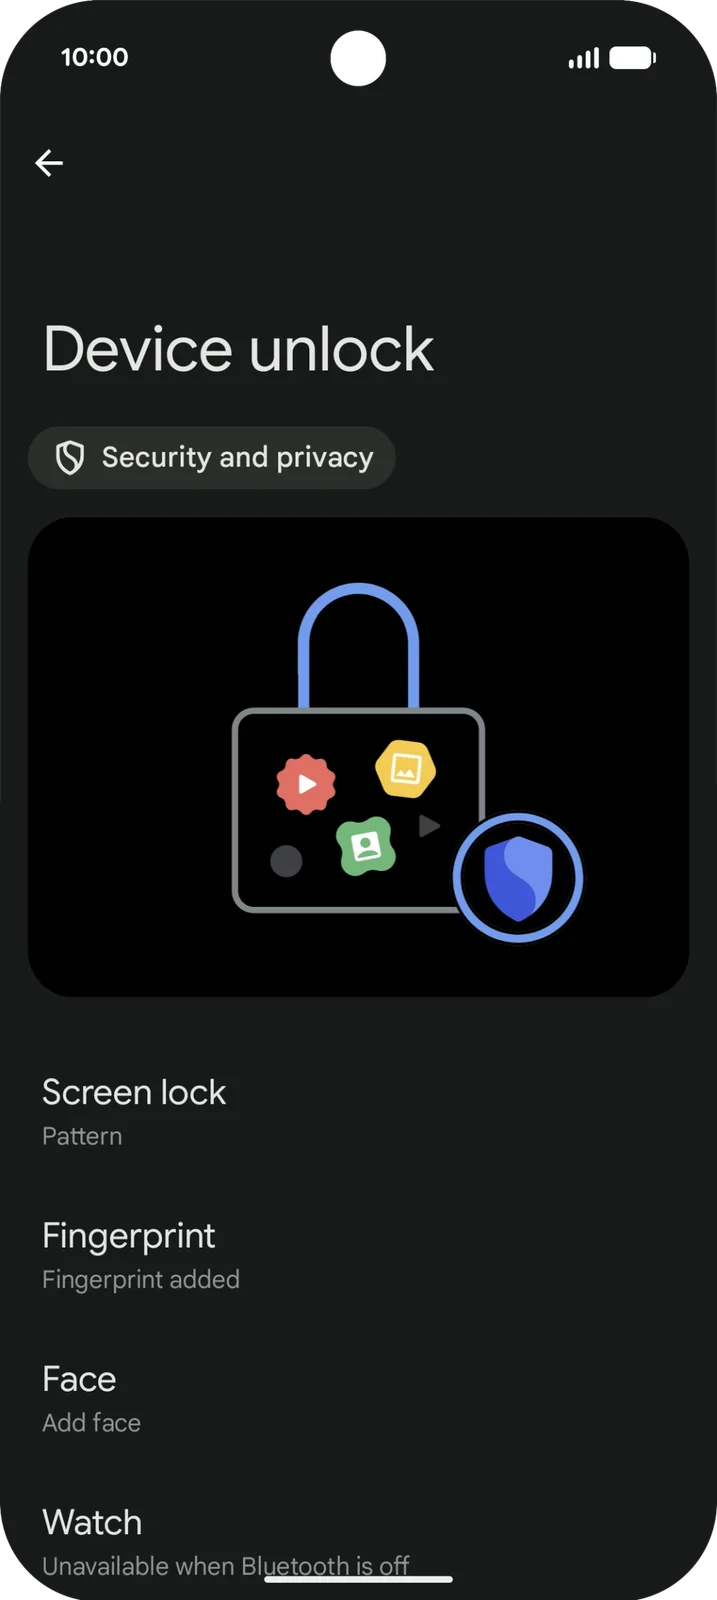
Check and try unlocking
Check that Fingerprint says Fingerprint added. Lock and wake your phone, then try your registered finger.
Device unlock now shows Fingerprint added. The final lock-screen test is not pictured. Keep Screen lock enabled.
IF SOMETHING LOOKS DIFFERENT
A little help along the way.
Your menus may look different after an update. Look for the same control name and take your time.
I cannot find that option+
Check that this guide covers your device and software. If the names do not match, use the manufacturer’s instructions linked below for your model.
I need to go back a step+
Use Previous step or select a step number above. This changes the guide only; it does not undo anything on your device.
Are these pictures of my device?+
They are example screens showing exactly where to tap. Your names, apps, wallpaper and layout may look a little different, but the options you need are the same. Some pictures show what you should see after a step.