SMALL STEPS. USEFUL SKILLS.
Set up Face ID or Touch ID
Unlock the phone quickly and securely without typing your passcode every time.
Use the pictures where shown. Follow the short instructions between them.
STEP 1 OF 6
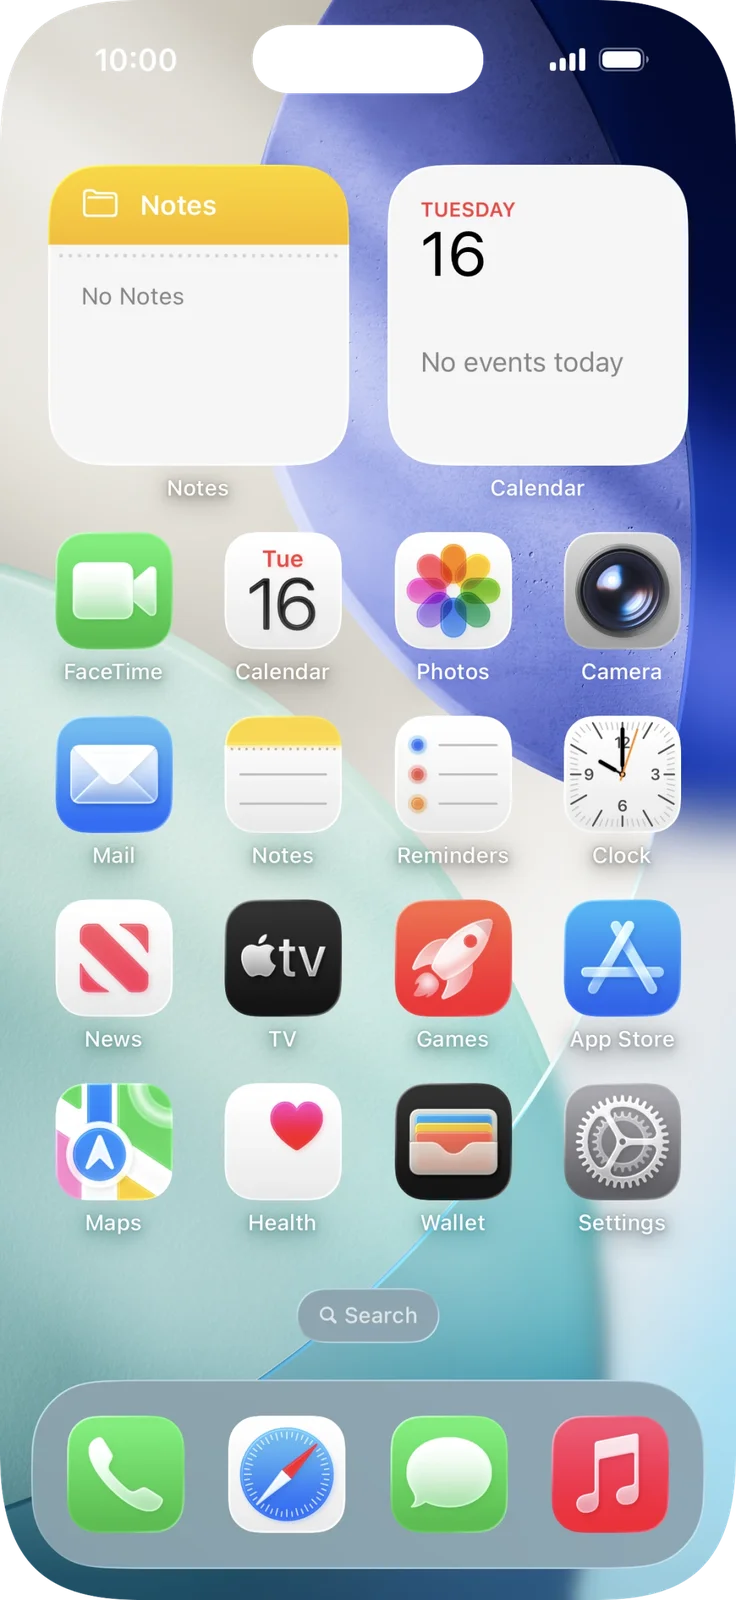
Open Settings
Tap the grey Settings app on your Home Screen.
Prefer to see all the steps together?+
STEP 1
Open Settings
Tap the grey Settings app on your Home Screen.
STEP 2
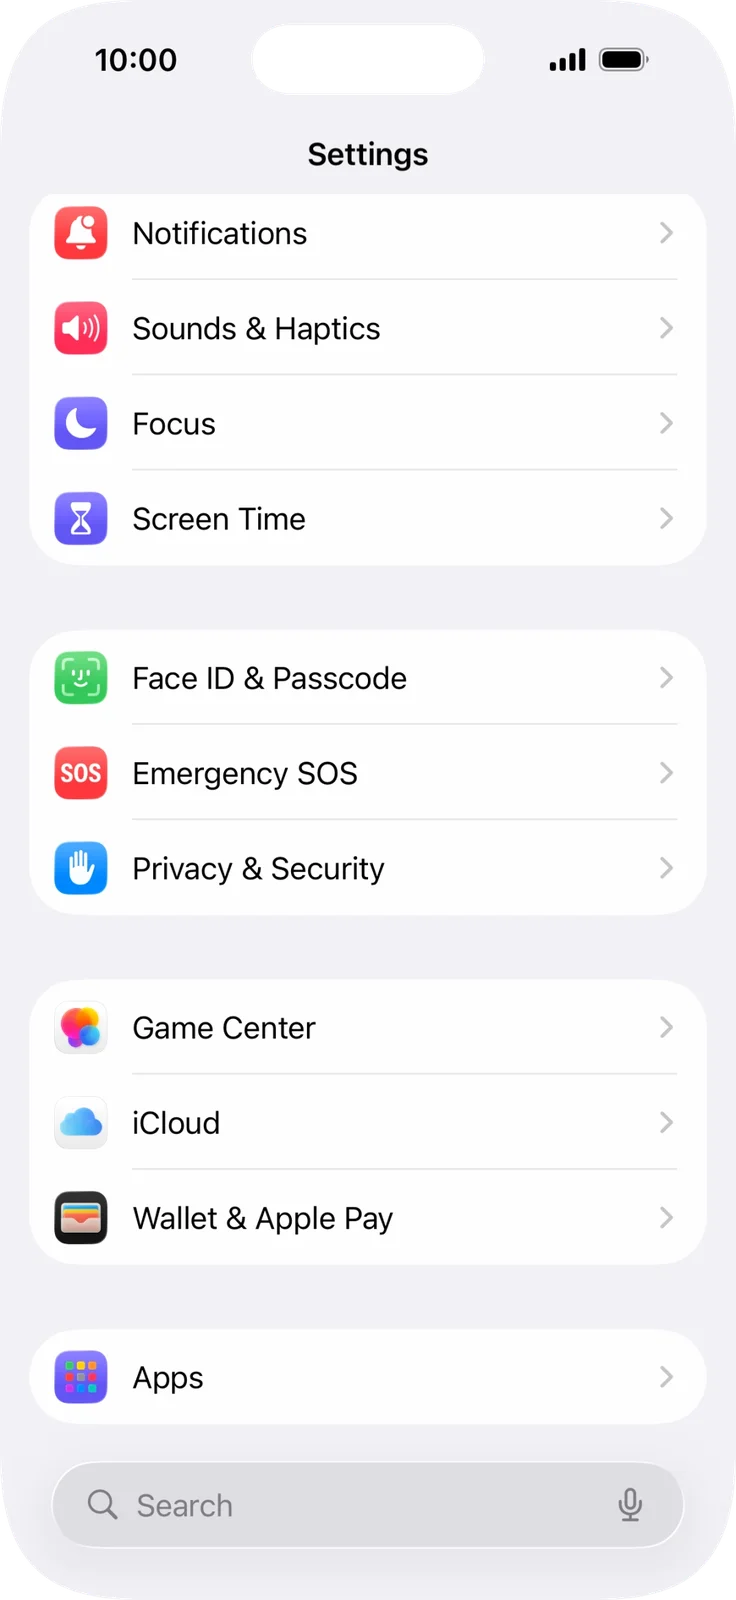
Tap Face ID & Passcode
Scroll down and tap Face ID & Passcode.
On an iPhone with a Home button this is called Touch ID & Passcode.
Scroll down in Settings to find this row. This picture is for Face ID models; a Home-button iPhone uses Touch ID & Passcode.
STEP 3
Enter your passcode
Type your iPhone passcode.

STEP 4
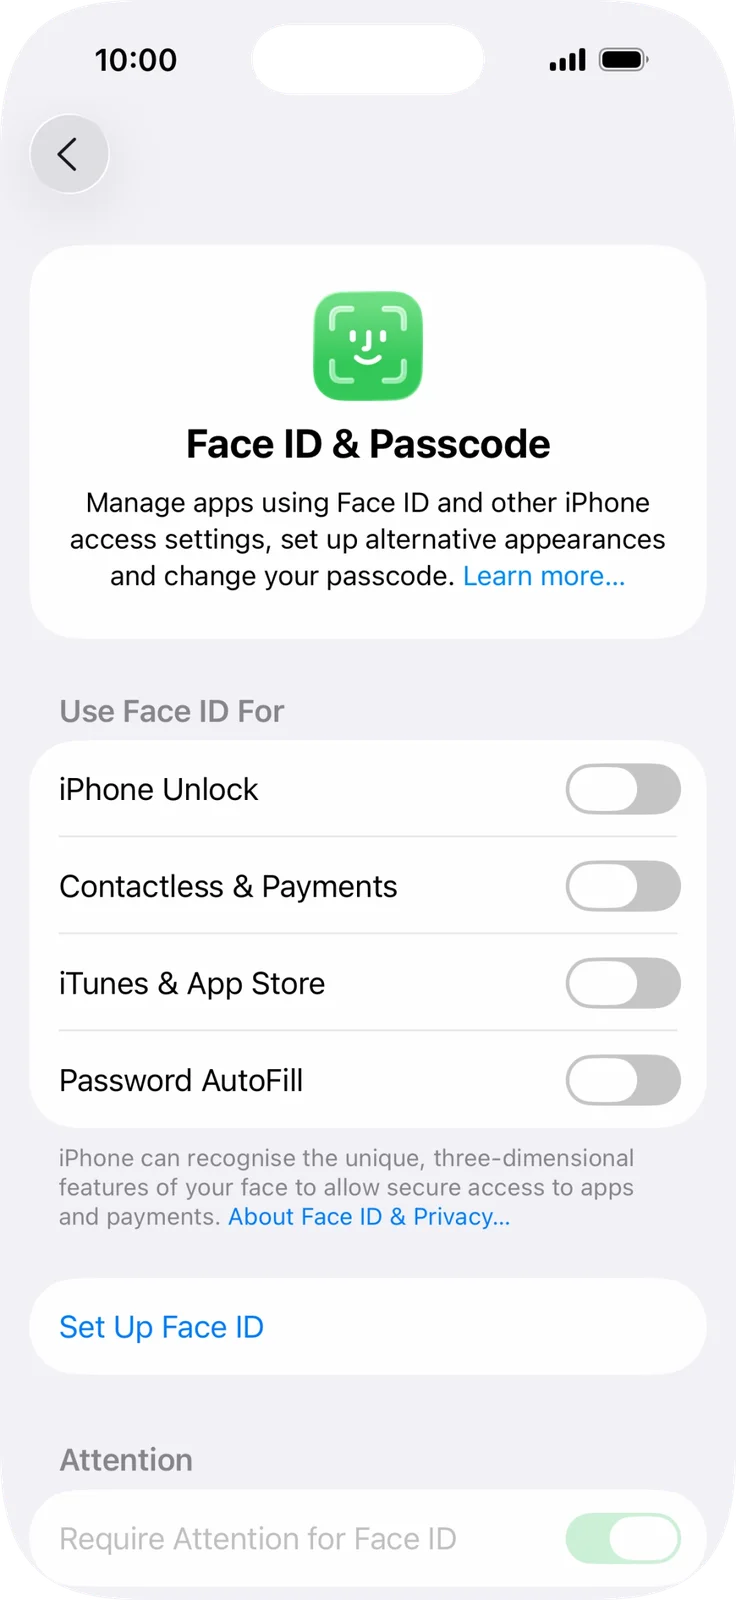
Tap Set Up Face ID
On an iPhone with a Home button, tap Add a Fingerprint instead.
Enter your passcode first. This shows the Face ID setup option; Touch ID models have different controls.
STEP 5
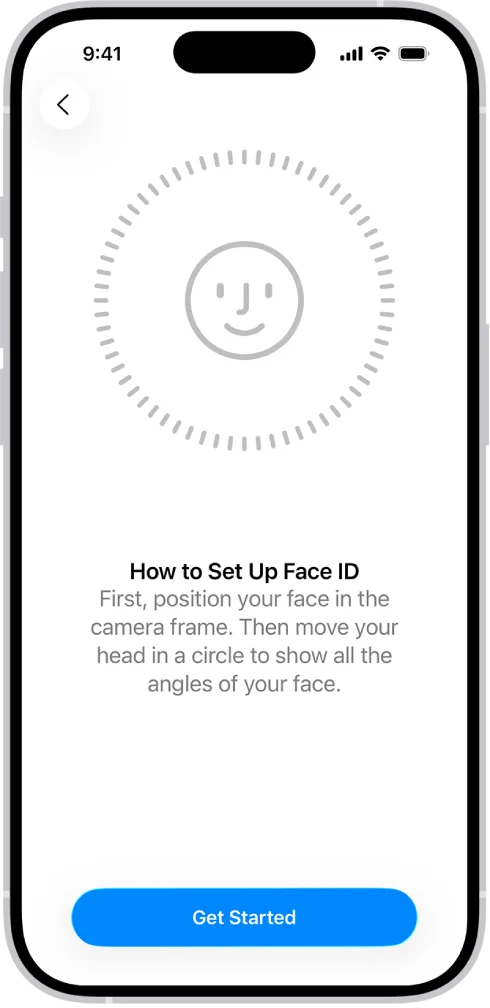
Follow the on-screen steps
On a Face ID model, tap Get Started, position your face in the frame, then gently move your head as instructed. If your device uses Touch ID, follow its fingerprint instructions instead.
This picture is only for Face ID. It does not show the Touch ID setup used on devices with a Home button.
STEP 6
Test it works
Lock and wake the device. Use the face or finger you registered to check that it unlocks. You may need to enter your passcode first after restarting.
IF SOMETHING LOOKS DIFFERENT
A little help along the way.
Your menus may look different after an update. Look for the same control name and take your time.
I cannot find that option+
Check that this guide covers your device and software. If the names do not match, use the manufacturer’s instructions linked below for your model.
I need to go back a step+
Use Previous step or select a step number above. This changes the guide only; it does not undo anything on your device.
Are these pictures of my device?+
They are example screens showing exactly where to tap. Your names, apps, wallpaper and layout may look a little different, but the options you need are the same. Some pictures show what you should see after a step.